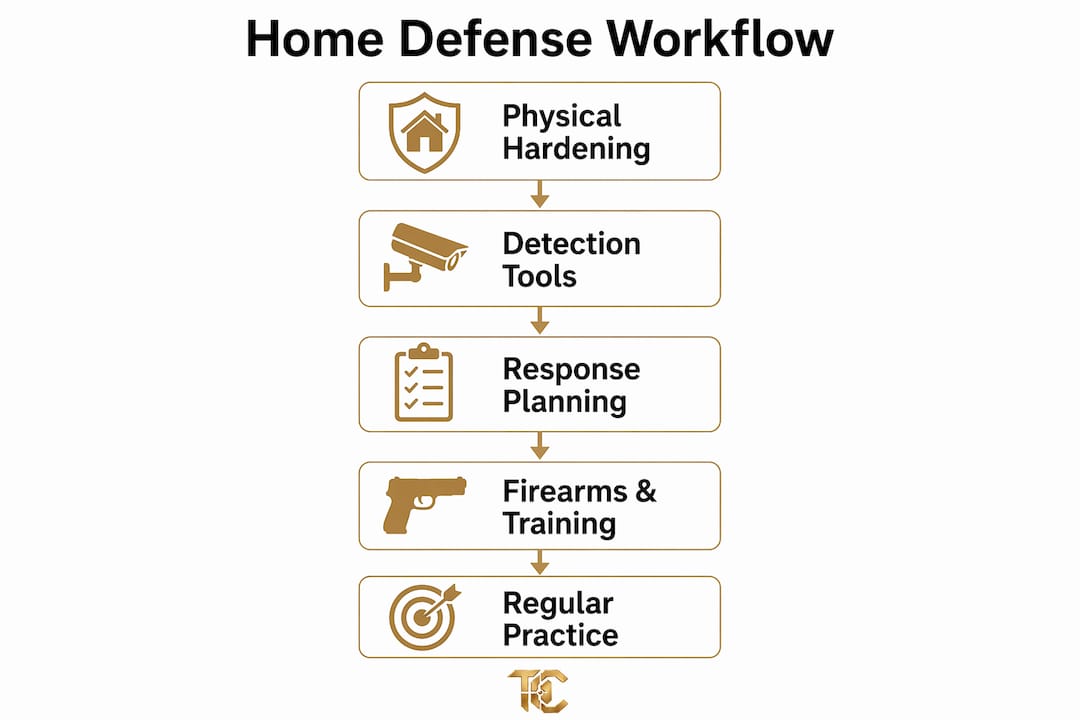
Home Defense Workflow: A Layered Security Plan


A home defense workflow is a structured, step-by-step system that combines physical barriers, detection technology, and household response protocols to protect your family and property. Layered security combining reinforced doors, motion-activated lighting, and alarms deters 95% of break-ins, because most intruders abandon a target after just 60 seconds of noisy resistance. This guide walks you through each layer of that system, from hardening your entry points to running household drills, so you can build a plan that actually holds up under pressure.
What are the essential physical security components in a home defense workflow?
Physical hardening is the foundation of any solid home protection method. Before you invest in cameras or alarms, your doors, windows, and frames need to be strong enough to slow an intruder down. Most break-ins occur through doors (34%) and windows (23%), which tells you exactly where to spend your time and money first.
Doors and frames
Standard door frames fail under a single kick because the strike plate screws only bite into the door casing, not the wall studs. The fix is straightforward: reinforce door frames with 3-inch screws driven into studs, and install ANSI Grade 1 or Grade 2 deadbolts. Grade 1 is the highest residential rating and costs under $100 per entry point. That is a small price for the most common point of forced entry.
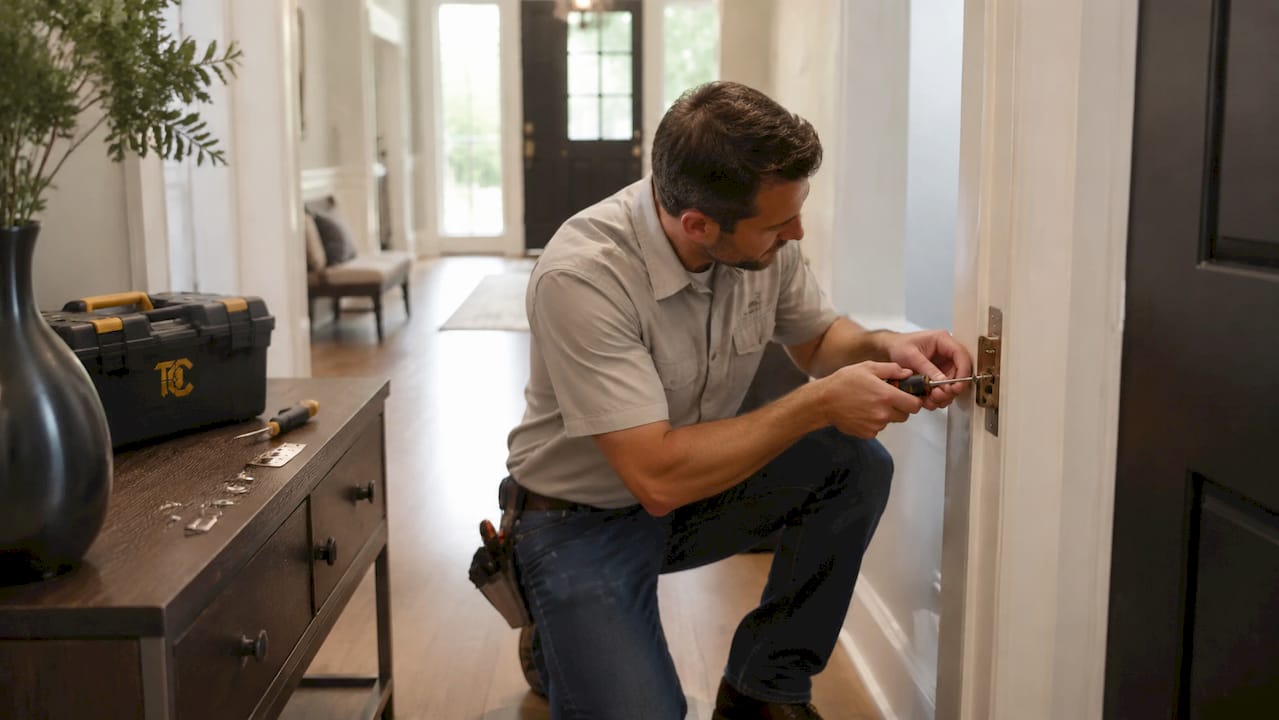
Sliding glass doors and back entrances are the most overlooked vulnerabilities in most homes. A simple door bar or secondary pin lock on a sliding door costs less than $20 and adds meaningful resistance. Never treat a secondary entrance as less important than your front door.
Windows and sightlines
Ground floor and accessible windows need contact sensors, secondary locks, and security film. Security film does not stop glass from breaking, but it holds the shards together and slows entry by several seconds. Those seconds matter.
Trim your landscaping so there are no large shrubs near entry points. Dense hedges give intruders cover to work undetected. Clear sightlines from the street to your doors and windows remove that cover entirely.
Pro Tip: Fast, loud forced entry is what stops most break-ins. Every physical upgrade you add increases the time and noise required to get through, which is exactly what drives intruders away.
| Upgrade | Effectiveness | Approximate Cost |
|---|---|---|
| ANSI Grade 1 deadbolt | High: resists kick-in and picking | Under $100 |
| 3-inch strike plate screws | High: prevents frame splitting | Under $20 |
| Window security film | Medium: slows glass entry | $30–$80 per window |
| Sliding door bar lock | Medium: blocks forced slide | Under $25 |
| Door reinforcement kit | High: full frame protection | $50–$150 |
How do detection technologies fit into a home defense workflow?
Detection tools are your early warning system. They do not stop an intruder on their own, but they buy you time and create visible deterrents that reduce the chance of an attempt in the first place. Motion-activated LED lighting reduces burglary risk by 36–80% when combined with doorbell cameras and other visibility measures. High-quality LED motion fixtures cost under $50, making this one of the highest-return upgrades available.
Cameras and lighting placement
Doorbell cameras like those from Ring or Google Nest cover your primary entry and record anyone who approaches. Eave-mounted cameras cover driveways, side yards, and back doors. Driveway floodlight cameras combine motion-triggered lighting with video recording in a single unit. Place cameras at 8–10 feet high to capture faces without being easily reached or redirected.
Visible deterrents work even before an intruder gets close. Alarm company yard signs and window decals cause 60% of burglars to bypass homes entirely. That number reflects a simple truth: most break-ins are opportunistic, not planned. Remove the opportunity and you remove most of the risk.
Alarm systems and smart integration
Contact sensors on doors and windows, glass-break detectors, and interior motion detectors form the core of a residential alarm system. Brands like SimpliSafe, Ring Alarm, and ADT all offer DIY or professionally monitored options. Monitored systems add a response layer when you are away or asleep.
Regular maintenance and firmware updates are critical to keeping smart devices effective. Many security breaches happen because homeowners set up cameras and alarms and never update them again. Set a quarterly reminder to test sensors, check camera angles, and update device software.
Pro Tip: Connect all cameras and sensors to a dedicated, password-protected Wi-Fi network separate from your main home network. This limits exposure if any device is compromised.
| Detection Tool | Pros | Cons | Approximate Cost |
|---|---|---|---|
| Motion-activated LED light | Cheap, high deterrence | No recording | Under $50 |
| Doorbell camera | Visible, records entry | Limited field of view | $100–$250 |
| Glass-break detector | Covers multiple windows | False positives possible | $30–$60 |
| Monitored alarm system | 24/7 response | Monthly fee required | $20–$60/month |
| Driveway floodlight camera | Combines light and video | Requires power source | $150–$300 |
What are the best practices for a home defense response plan?
A response plan is the part most homeowners skip, and it is the part that determines what actually happens when something goes wrong. Simple, clear plans understood by every household member outperform complex ones every time. Complicated plans increase hesitation and reduce coordination under stress.
Here is a practical framework for building your household response plan:
- Map your home layout. Walk every room and identify safe zones with solid walls, minimal windows, and clear sightlines to entry points. A primary bedroom at the end of a hallway is a natural defensive position. Mark it on a simple floor sketch.
- Assign roles by household member. One adult calls 911. Another moves children to the safe zone. Roles eliminate confusion when adrenaline is high and thinking is hard.
- Establish verbal codes. A single word or short phrase signals the household to move to the safe zone without broadcasting your location or intentions to an intruder. Pre-established verbal codes and two-way radios are far more reliable than shouting or phone calls during an emergency.
- Plan movement routes. Identify the path from each bedroom to the safe zone. Avoid routes that cross open entry points or require passing through a room with exterior doors.
- Run drills. Practice the plan at least twice a year. Time it. Identify where it breaks down and fix those gaps. A plan you have never practiced is just a theory.
- Keep it short. Your plan should fit on one page. If it takes more than two minutes to explain, it is too complex.
The most common pitfall is building a plan around ideal conditions. Practice it at night, from a dead sleep, with kids who are groggy and confused. That is the real test.
How to integrate firearms and tactical tools into your home defense plan
A firearm is a serious tool in a home defense plan, and it requires the same deliberate approach as every other layer. Selecting the right platform matters, but training and dry fire practice deliver more real-world value than any equipment upgrade. Consistent practice reduces hesitation and improves your response under stress, which is exactly what you need when it counts.
Firearm selection and storage
For home defense, a full-size pistol or a short-barreled shotgun in 12-gauge are both proven choices. Pistols offer maneuverability in tight hallways. Shotguns offer stopping power and reduced over-penetration risk with the right load. Your personal defense ammo selection should prioritize reliable expansion and controlled penetration to protect family members in adjacent rooms.
Safe storage that allows quick access is a real requirement, not a compromise. Biometric or RFID quick-access safes from brands like Vaultek or Fort Knox open in under two seconds and prevent unauthorized access. Mount the safe to a fixed surface so it cannot be removed.
Training and tactical accessories
Here is a practical checklist for responsible firearm integration:
- Complete a home defense specific firearms course from a certified instructor
- Practice dry fire training at least three times per week to build muscle memory
- Work on marksmanship skills at the range monthly, focusing on low-light and close-distance drills
- Add a weapon-mounted light to your home defense firearm so you can identify a target in the dark
- Review responsible firearm practices regularly to stay current on safe handling and storage standards
- Study defensive shooting scenarios to understand how real situations unfold and how decisions are made under pressure
Pro Tip: Prioritize training over gear purchases. A well-trained shooter with a basic firearm outperforms an untrained shooter with premium equipment in every realistic scenario.
Tactical accessories like weapon lights, red dot sights, and improved grips each serve a specific function. Add them only after you have mastered the fundamentals on your current setup. Gear that you have not trained with adds complexity, not capability.
Key takeaways
A complete home defense workflow requires layered physical security, reliable detection tools, a practiced family response plan, and responsible firearm integration working together.
| Point | Details |
|---|---|
| Harden entry points first | Install ANSI Grade 1 deadbolts and 3-inch strike plate screws before adding technology. |
| Use visible deterrents | Alarm signs and motion lighting reduce break-in attempts before they start. |
| Keep your response plan simple | One-page plans with assigned roles perform better under stress than complex ones. |
| Train more than you gear up | Dry fire practice and range time build the skills that matter most in a real event. |
| Maintain your systems | Test sensors, update firmware, and review your plan at least twice per year. |
Why most home defense plans fall apart before they’re needed
I have seen homeowners spend thousands on cameras, alarms, and firearms and still have a plan that would collapse the moment something real happened. The gear was solid. The plan was not. That gap is where most home defense efforts fail.
The uncomfortable truth is that decision-making under pressure determines the outcome more than any piece of equipment. I have watched people freeze during a simple drill because they had never actually walked through their own plan. They knew it existed. They had never practiced it. Those are two very different things.
What I have found actually works is treating home defense like a living process rather than a one-time setup. You install the deadbolts, you run the drill, you find the weak point, and you fix it. Then you do it again six months later. The families who do this consistently are genuinely prepared. The ones who buy the gear and call it done are not.
The other thing I keep coming back to is simplicity. A two-word verbal code that your kids understand beats a ten-step protocol every time. Clear communication under stress is a skill, and it requires practice with pre-charged two-way radios and simple voice codes that prevent confusion when it matters most. Start there before you add anything else.
— Brian
Build your home defense plan with Tungstencreektactical
Tungstencreektactical carries the firearms, tactical accessories, and expert guidance to support every layer of your home protection plan. Whether you are selecting your first home defense firearm or upgrading your current setup, the team at Tungstencreektactical helps you make informed decisions grounded in real-world performance.

Explore custom-built firearms precision-fitted to your needs, or browse the full selection of tactical accessories designed for responsible owners. Tungstencreektactical also offers a firearms comparison guide to help you match the right platform to your home defense requirements. Every product comes backed by the transparency and customer trust that define the Tungstencreektactical brand.
FAQ
What is a home defense workflow?
A home defense workflow is a structured plan combining physical security upgrades, detection technology, and household response protocols to protect your home from intrusion. It works in layers, where each measure independently increases the time and risk for an intruder.
How many layers does an effective home defense plan need?
An effective plan includes at least three layers: physical hardening of entry points, detection and deterrence tools, and a practiced family response plan. Adding a responsibly stored firearm creates a fourth layer for direct defense.
What physical upgrades have the highest impact?
ANSI Grade 1 deadbolts and 3-inch strike plate screws into door studs deliver the highest impact per dollar spent. Most forced entries target door frames, so reinforcing them stops the most common attack method.
How often should you practice your home defense plan?
Run a full household drill at least twice per year, and review your plan after any change to your home layout or household composition. Practice at night from a realistic starting point to identify gaps you would not catch during a daytime walkthrough.
Do alarm signs actually deter burglars?
Yes. Visible alarm signage and window decals cause 60% of burglars to bypass homes entirely, according to security research. Place signs near primary entries and at street-visible locations for maximum effect.
Recommended
Related Post

Discover the 5 ways
An introduction to Tactical Luxury Guns & Coffee We founded

Top 5 Best PCC’s
In 2026, the Pistol Caliber Carbine (PCC) market is no