What Is Rifle Zeroing: Explained for Precision Shooters
Rifle zeroing is one of those fundamentals that separates shooters who hit their mark from those who wonder why they keep missing. What is rifle zeroing, exactly? At its core, it’s the process of aligning your rifle’s sights so that where you aim matches where your bullet actually lands at a specific distance. Most shooters think a couple of rounds on paper is enough to call it done. It isn’t. True zeroing requires patience, the right technique, and an understanding of what your rifle is actually telling you. This guide covers all of it, from the basics through advanced group analysis.
Table of Contents
- Key takeaways
- What rifle zeroing means and how it works
- Methods and tools used for rifle zeroing
- Advanced zeroing: group center analysis
- Step-by-step guide to zeroing your rifle
- Maintaining and verifying your rifle zero over time
- My take on what most shooters get wrong
- Gear up for precision at Tungstencreektactical
- FAQ
Key takeaways
| Point | Details |
|---|---|
| Zero means POA equals POI | Your rifle is zeroed when the point of aim and point of impact match at a chosen distance. |
| Group center beats single shots | Analyzing the mean point of impact across multiple rounds produces a far more reliable zero. |
| Tools and consistency matter | Bore sighters, stable rests, and consistent ammo all reduce variables during the zeroing process. |
| Zero shifts happen over time | Environmental changes and loose hardware can move your zero without any obvious warning signs. |
| Step-by-step process is repeatable | Following a structured sequence of shooting, recording, and adjusting builds a zero you can trust. |
What rifle zeroing means and how it works
Rifle zeroing, at its simplest, means calibrating your sights so that your point of aim (POA) and your point of impact (POI) meet at a specific distance. When you look through a scope or down iron sights, you’re using a sight line. Your barrel, however, sits below that sight line and is angled slightly upward to compensate. A bullet leaves the barrel, arcs upward through the sight line, and then drops below it again due to gravity. Zeroing sets the distance at which the bullet crosses back through the sight line on its way down.
Understanding this geometry makes the entire process click. Zeroing adjusts rifle sights so POA matches POI at your chosen distance, accounting for both bullet drop and windage drift. The distance you zero for matters significantly. A 100-yard zero is common for hunting and range work because it gives you a predictable trajectory curve at both shorter and longer distances.
Here are the core concepts you need to have locked in before you begin:
- Point of aim (POA): Where your sights or reticle are centered on the target.
- Point of impact (POI): Where the bullet actually strikes.
- Zero distance: The specific range at which POA and POI align.
- Bore line vs. sight line: The barrel and sights are offset; zeroing corrects for this offset at your chosen range.
- Bullet trajectory: The curved path a bullet travels, influenced by gravity, velocity, and air resistance.
A 100-yard zero doesn’t mean your rifle shoots flat at every distance. It means that at 100 yards, the bullet crosses your reticle. Inside that distance, you may shoot slightly high. Beyond it, the bullet drops progressively. Choosing the right zero distance depends on your intended use.
Methods and tools used for rifle zeroing
Getting to a true zero starts before you fire a single round. The tools and techniques you use will directly affect how reliable your result is. Think of it like brewing a consistent cup of coffee. The equipment and process matter as much as the ingredient itself.
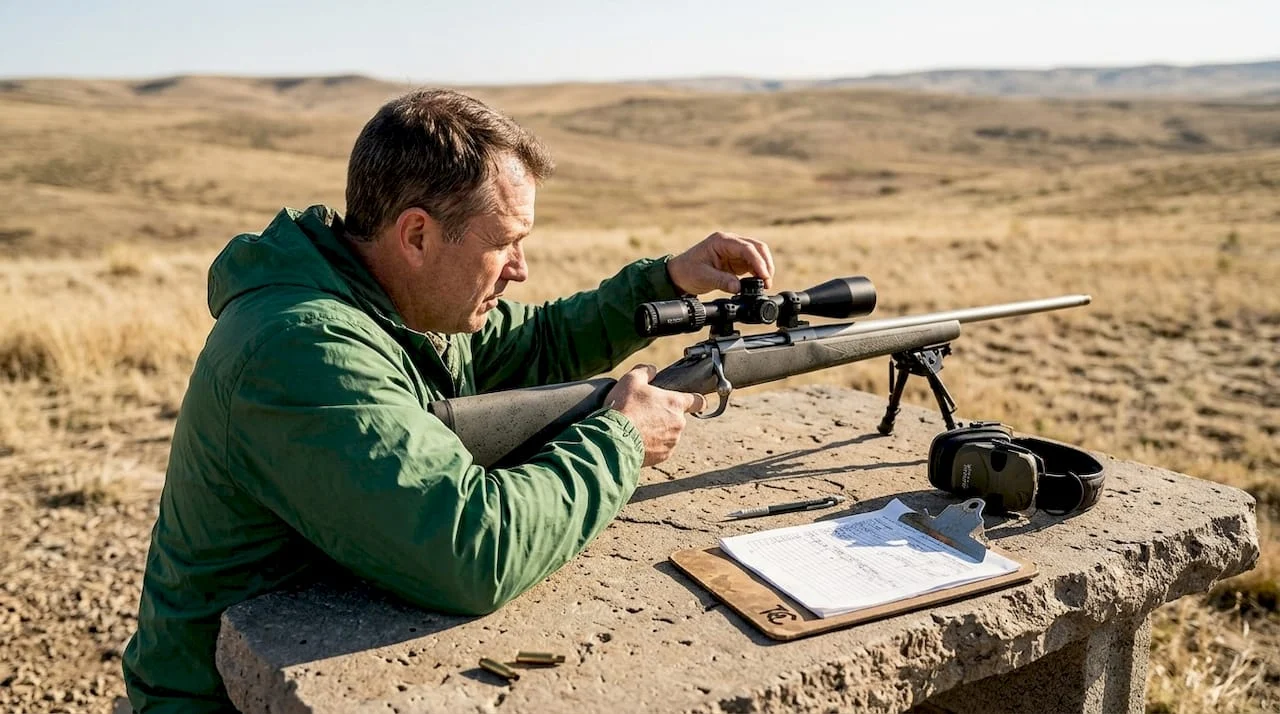
Bore sighting is typically the first step. A laser bore sighter slides into the muzzle or chamber and projects a dot onto the target. You then adjust your scope reticle to match that dot, getting you on paper before live fire. This saves ammo and time. Mechanical bore sighters work similarly, using a collimator aligned with the bore. Two-shot zeroing is possible with proper bore sighting and careful adjustment, which makes this initial step worth taking seriously.
Once on the range, a stable shooting rest is non-negotiable. Sandbags, a lead sled, or a solid bipod removes shooter movement from the equation. You want to isolate the rifle’s performance, not your own steadiness. Inconsistent body position from shot to shot introduces variables that corrupt your data.
Common tools and setup components include:
- Laser bore sighter: Projects a reference point to align scope before live fire.
- Mechanical collimator: Attaches to the muzzle for bore-to-scope alignment.
- Windage and elevation turrets: Scope turrets adjust in increments of 0.25 MOA or 0.1 mils, moving POI approximately 0.25 inches per click at 100 yards.
- Shooting rest or bipod: Eliminates shooter movement for clean, comparable shots.
- Consistent ammunition: Using the same load throughout the zeroing session prevents ballistic variables from clouding your adjustments.
Environmental conditions play a role too. Wind, lighting, and even temperature affect where your bullet lands. Try to zero in calm, stable conditions whenever possible. Environmental factors like temperature and humidity can subtly shift zero over time, so controlling conditions during initial zeroing gives you a cleaner baseline.
Pro Tip: Always record your scope adjustments in writing during the zeroing session. Counting clicks under range conditions is easy to lose track of, and written notes let you reconstruct your process if something goes wrong.
Advanced zeroing: group center analysis
Here’s where most shooters fall short. They fire three rounds, pick a point between the holes, and call it a zero. What they actually have is a “near-o.” Close, but not verified. Shooting too few rounds and making imprecise corrections often produces this result, and many shooters never realize the difference until accuracy becomes critical.
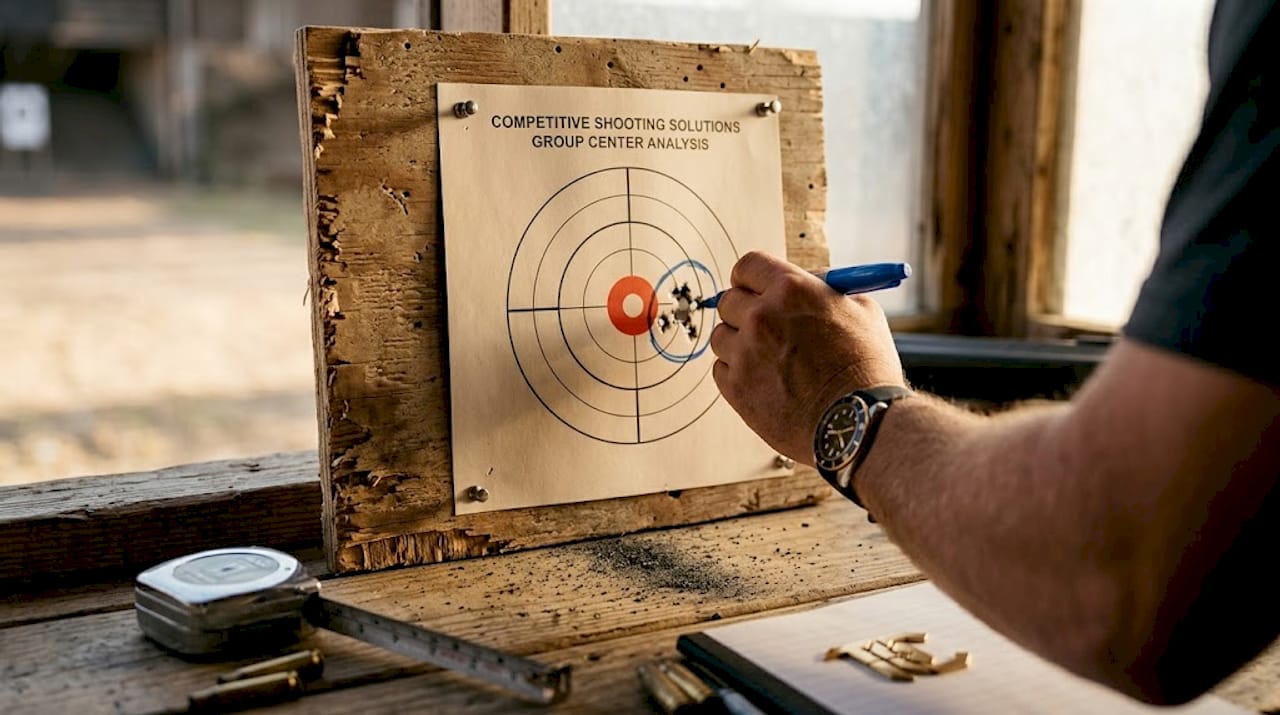
The more reliable approach uses group-based analysis. You fire multiple rounds under consistent conditions and then calculate the mean point of impact (the geometric center of all your shots). That center, not any single shot, represents your rifle’s true tendency at that distance. Adjusting your scope to that center is genuine zeroing.
Here’s how the two approaches compare:
| Method | Rounds fired | Reliability | Ammo used | Best for |
|---|---|---|---|---|
| Traditional 3-shot zero | 3 to 5 | Moderate | Low | Quick field checks |
| Group center analysis | 10 to 20+ | High | Moderate | Precision and competition |
| Single-shot bore sight only | 1 | Low | Very low | Getting on paper only |
Shooting 20+ rounds to assess group center delivers a statistically sound zero compared to the traditional 3 to 5 shot approach. Yes, it takes more ammo and time. The payoff is a zero you can actually trust under pressure. There are apps and ballistic tools that let you plot each shot impact and calculate the mean automatically, which removes the math from the process and speeds things up considerably.
Using group-based offset measurements reduces the influence of random shot errors, making your final zero more repeatable. Once you know the offset between your reticle center and your mean POI, you dial in the exact number of clicks needed. This is precision, not guesswork.
Pro Tip: Use a Truglo or similar quality rifle scope with clearly marked, repeatable turret clicks. Vague or inconsistent turret feel defeats the purpose of precise group-based adjustments.
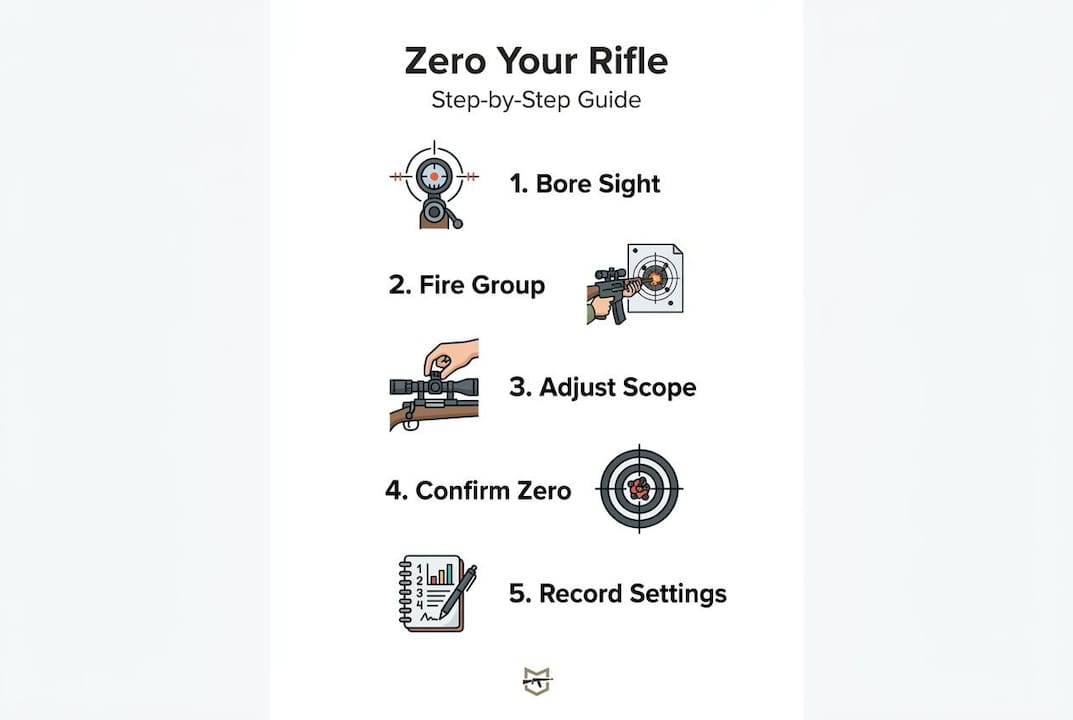
Step-by-step guide to zeroing your rifle
The steps below synthesize everything covered so far into a repeatable sequence. Follow them in order for the best result.
- Inspect and prepare your rifle. Clean the barrel and verify that your scope rings and base are torqued to manufacturer specs. Loose components cause inconsistent shot placement and corrupt any zeroing session before it starts.
- Select your ammunition. Choose a single, consistent load you plan to use regularly. Do not mix loads during a zeroing session. Ballistic differences between loads will show up as group spread.
- Bore sight your rifle. Use a laser bore sighter to get your reticle approximately on target before firing. This gets you on paper with your first shots and conserves ammo.
- Set up at your chosen zero distance. For most shooters, 100 yards is the standard starting point. Use a clearly marked target with a defined aiming point.
- Fire your first group from a solid rest. Three to five rounds is enough to get an initial impact location. Record where each shot lands relative to your aiming point.
- Calculate your adjustment. Measure the offset between your group center and the target’s aiming point. Convert the offset into turret clicks using your scope’s MOA or mil value.
- Dial in the adjustments. Turn the elevation and windage turrets the calculated number of clicks. Most scopes adjust in 0.25 MOA increments per click, which equals roughly 0.25 inches at 100 yards.
- Fire a second group and record impacts. This group should land closer to your aiming point. If it does, continue firing and analyzing. If it doesn’t, recheck your click count and repeat.
- Confirm zero with a larger group. Fire 10 to 20 rounds and calculate the mean POI. If the mean is at your aiming point, you have a verified zero. If there’s still offset, make final micro-adjustments.
- Document everything. Record your final scope settings, ammunition used, distance, and environmental conditions. This becomes your reference for future sessions.
The process reads as methodical because it is. Responsible zeroing isn’t a shortcut exercise. It’s a skill that pays dividends every time you pull the trigger at a moment that counts. Practicing proper firearm safety throughout each step is just as fundamental as the technique itself.
Maintaining and verifying your rifle zero over time
A zero you set today will not automatically hold forever. Several factors can shift it without obvious warning signs, and knowing what to watch for protects both your accuracy and your confidence in the field.
Common causes of zero shift include:
- Loose scope rings or bases: Vibration from repeated firing can gradually loosen mounts. Check and retorque after heavy use sessions.
- Temperature extremes: Cold temperatures can affect scope oil viscosity and change point of impact slightly. Heat can expand metals and shift zero in the opposite direction.
- Ammunition changes: Switching from one load to another, even within the same caliber, often changes POI. Always re-verify zero when changing ammo.
- Heavy impacts or drops: Any impact to a scoped rifle risks shifting the zero. Always check after an unintended drop.
- Barrel fouling: Extreme fouling can subtly change bullet flight. Regular cleaning, using guidance from a firearm cleaning guide, keeps this variable controlled.
A good rule of thumb: check your zero at the start of every new shooting season, after any significant travel with your rifle, and after any mechanical changes to scope or mounts. Properly zeroed rifles combined with consistent verification reduce both frustration and wasted ammo during live sessions. Reviewing methods for maintaining firearm accuracy gives you additional strategies to keep your rifle performing at its peak between zeroing sessions.
My take on what most shooters get wrong
I’ve watched a lot of shooters walk off the range convinced they’re zeroed when what they actually have is a rough approximation. And I get it. The process can feel done after a few shots land near center. But near center isn’t zero, and the difference shows up at 300 yards in ways that are genuinely painful.
In my experience, the single biggest mistake is impatience. Shooters want to be done in 20 minutes and move on to the fun part. But zeroing is the foundation of everything that follows. I’ve seen what happens when you invest in group-based analysis properly. Your adjustments become surgical. Your confidence at distance goes up. And you stop burning ammo on range days troubleshooting something that should have been dialed in from the start.
Technology has changed my own approach considerably. I now plot every shot in a ballistic app during zeroing sessions, calculate the mean POI, and make one clean adjustment instead of chasing individual fliers. It’s slower at first. But the zero I walk away with holds, and that matters when conditions get challenging.
One thing I don’t see discussed enough: ammunition quality and consistency are as much a part of zeroing as the scope and the technique. I treat load selection the way I’d approach selecting a hand-rolled cigar. You don’t want surprises in the blend. Consistency is the entire point. Cheap, inconsistent ammo will never give you a clean group to analyze, no matter how good your process is.
My bottom line: take zeroing seriously, use enough rounds to trust your data, and document what you learn. Every hour you put into a proper zero pays back tenfold in shooting performance and responsible gun ownership.
— Brian
Gear up for precision at Tungstencreektactical

If this guide has you thinking about upgrading what you’re shooting, Tungstencreektactical has you covered from the ground up. Whether you’re looking for a scope that delivers repeatable turret adjustments or a rifle that’s built to hold a consistent zero, the product selection is curated with the precision shooter in mind. The custom guns service at Tungstencreektactical lets you work directly with the team to build a rifle matched to your zeroing standards, your intended use, and your preferred ammunition. Browse the full firearm and gear catalog to find everything from optics to ammo that supports the kind of accuracy this guide covers.
FAQ
What does zeroing a rifle mean?
Zeroing a rifle means calibrating your sights so that your point of aim and point of impact align at a specific distance. The process accounts for bullet drop and lateral drift so your shots land exactly where you’re aiming.
How many shots does it take to properly zero a rifle?
While two-shot zeroing is possible with bore sighting, a reliable zero typically requires 10 to 20 rounds fired in groups so you can calculate the true mean point of impact and make accurate scope adjustments.
How often should I check my rifle’s zero?
Check your zero at the start of each shooting season, after any travel with your rifle, and after making any changes to your scope, mounts, or ammunition. Loose mounts and ammo changes are the most common causes of unexpected zero shifts.
What is the most common zero distance for a rifle?
One hundred yards is the most widely used zero distance for both hunting and general precision shooting. It provides a consistent reference point that allows predictable holdover or holdunder calculations at longer and shorter ranges.
What is the difference between a near-zero and a true zero?
A near-zero results from adjusting your scope based on too few shots or imprecise adjustments, leaving your POI slightly off center. A true zero is confirmed through group center analysis where the mean point of impact across multiple rounds aligns precisely with your point of aim.
Recommended
Related Post

Discover the 5 ways
An introduction to Tactical Luxury Guns & Coffee We founded
Top 5 Best PCC’s
In 2026, the Pistol Caliber Carbine (PCC) market is no